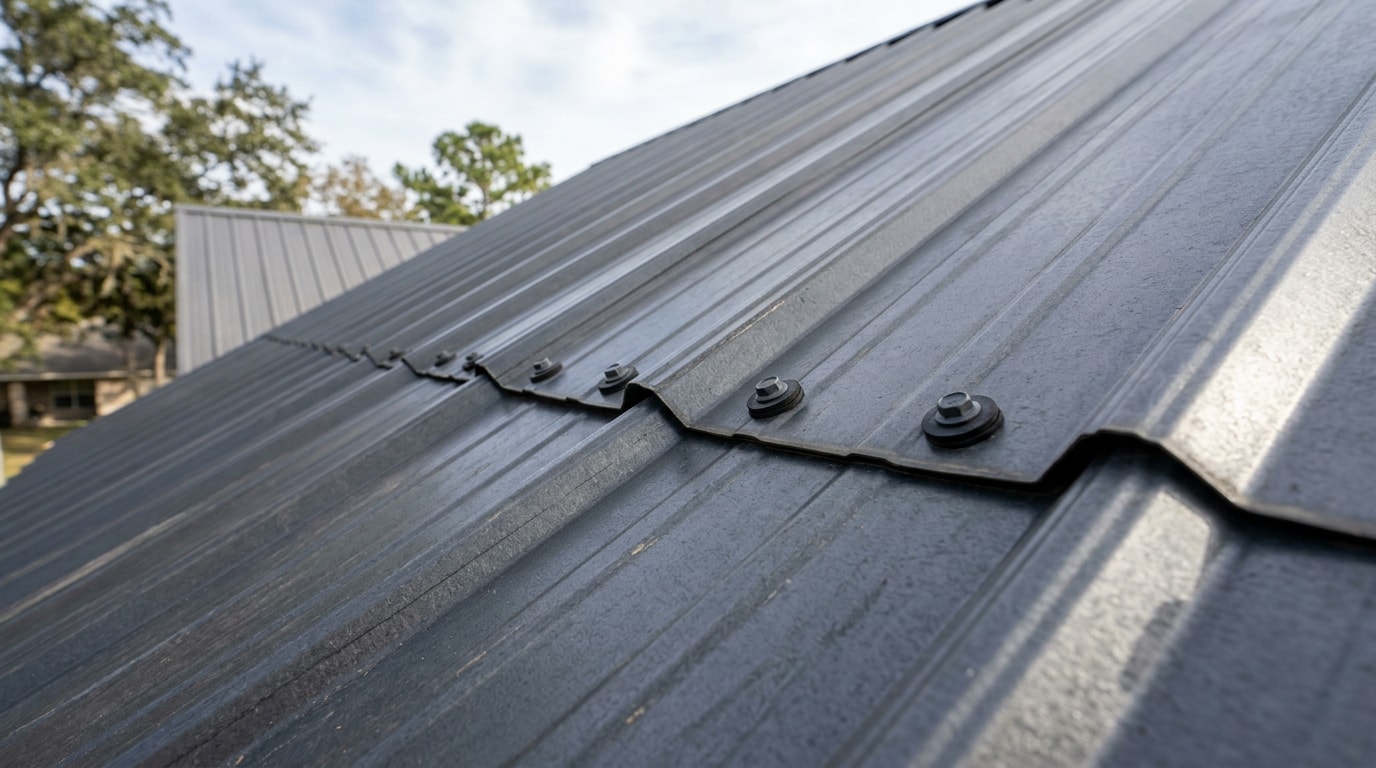
Overlapping metal roofing lengthwise correctly is what keeps a panel roof watertight for decades instead of leaking after a single rainy season. This seam, known in the trade as the end lap, is where one panel meets the next as they run up the slope, and the exact distance you leave matters more than most DIY guides let on. Get the lap short by even a couple of inches and wind-driven rain will find its way under the panel edge.
This guide was reviewed by Derek Holloway, lead roofing technician at Black Bear Home Exteriors, who has installed and repaired metal roofing across Southwest Washington for more than 12 years. Already dealing with a lap that's leaking? Contact our crew for a same-week look.
Key Takeaways
The lengthwise overlap, called an end lap, is the seam where one panel ends and the next begins along the roof's slope. It is different from a side lap, which runs between two panels sitting next to each other.
- Minimum end lap is 6 inches on roofs with a 3:12 pitch or steeper, per manufacturer installation manuals
- Low-slope roofs (2:12 to 3:12) need 8 to 12 inches of end lap, with sealant at every joint
- The upper panel always sits on top of the lower panel, never the reverse
- A lot of DIY articles online quote 1.5 to 2 inches for "lengthwise overlap," but that figure is actually the side lap measurement, not the end lap
- Sealant and correctly spaced fasteners are what actually make the lap watertight, not the panel material alone
Why Overlapping Metal Roofing Lengthwise Matters
A short end lap lets water creep under the upper sheet during wind-driven rain, especially on lower-pitched roofs where water sits longer before draining. An overly long lap wastes material and can create a high spot that catches debris and stresses fasteners over time.
The financial stakes are real. Standing seam metal roofing commonly runs $10 to $18 per square foot installed, so a lap that fails isn't a cheap fix once it's under finished panels. A manufacturer's own installation manual for exposed-fastener steel panels is explicit on this point: on slopes of 3:12 or greater, panels need a minimum 6-inch end lap, no exceptions for "it looked fine." Lap quality, not panel thickness or coating, is the detail that decides whether a metal roof stays dry for 40 years or starts leaking in five.
How Much Overlap Do You Need?
The minimum lengthwise overlap (end lap) for most exposed-fastener metal panels is 6 inches on roofs with a 3:12 pitch or steeper. Low-slope roofs between 2:12 and 3:12 need 8 to 12 inches, because water drains more slowly and has more time to wick back under the seam before it reaches the eave.
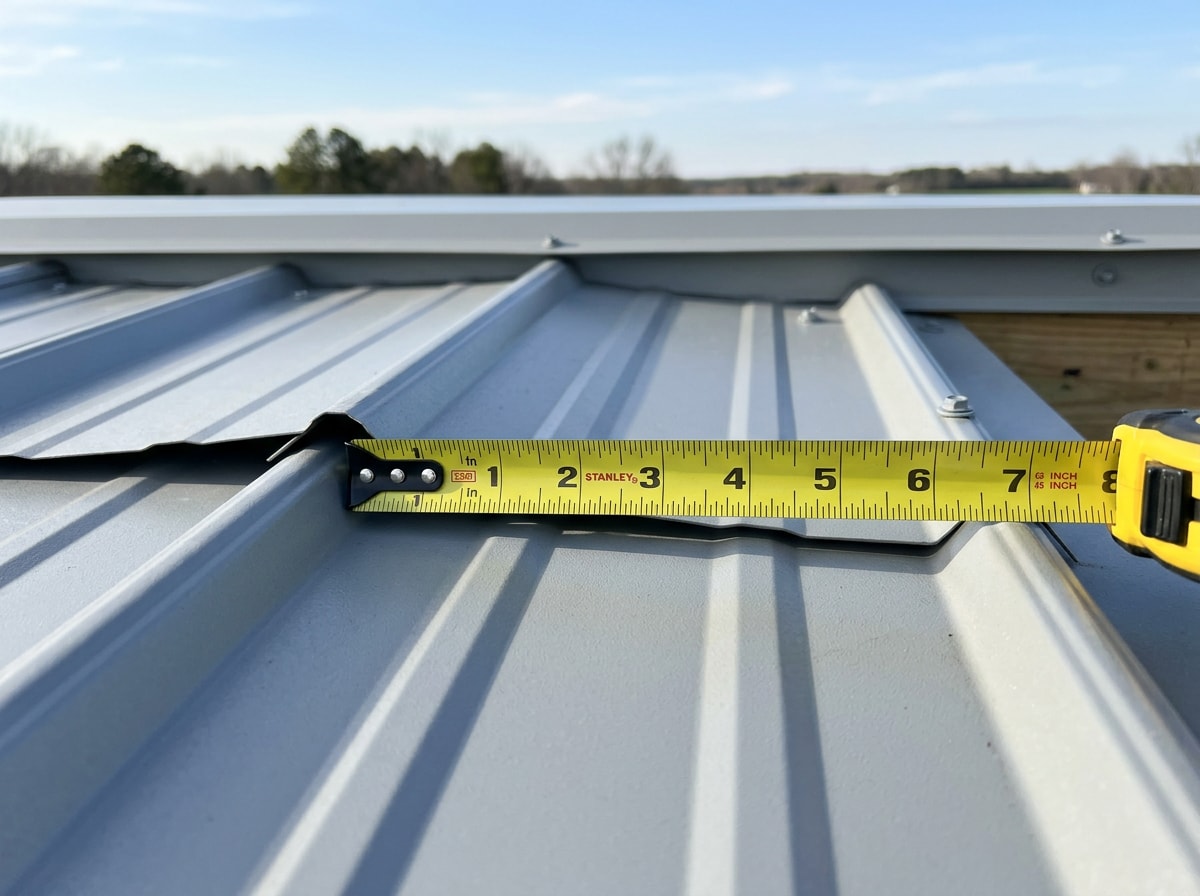
This is where a lot of confusion creeps into other guides on this topic. The 1.5 to 2 inch figure you'll see repeated across several DIY sites describes the side lap, the overlap between two panels sitting next to each other across the roof width, usually equal to one full corrugation or rib. It is not the lengthwise end lap. Mixing the two up is one of the fastest ways to under-lap a seam that actually needs 6 inches or more.
Here's a quick reference for end lap by pitch and condition:
| Roof Pitch | Conditions | Recommended End Lap (Lengthwise Overlap) |
|---|---|---|
| 3:12 or steeper | Normal rainfall | 6 inches minimum |
| 3:12 or steeper | Heavy rain or high wind | 8 inches, continuous sealant |
| 2:12 to 3:12 (low slope) | Any | 8 to 12 inches, sealant required at every lap |
| Below 2:12 | Any | Exposed-fastener panels generally not recommended; use standing seam instead |
Pitch requirements for lapped metal panel systems are also addressed in general building code, including the Florida Building Code's roof assemblies chapter, which sets minimum slope and deck requirements for metal roof coverings. Always confirm the exact number against your panel manufacturer's spec sheet before cutting anything, since profile and gauge can shift these minimums.
Step-by-Step Guide to Overlapping Metal Roofing Lengthwise
Once you know your target end lap distance, installation follows a consistent sequence from the first panel to the last. If you'd rather have a licensed crew handle it, our roof installation team can walk the site with you first.
Measure and Position the First Panel
Measure the full length of your roof to calculate how many panels you need and how much end lap each run requires. Position the first sheet at the eave, overhanging the drip edge by about 1 to 2 inches, and check that it's square. Every later panel depends on this one being straight. Mark cutting lines with chalk and cut with a power shear or metal-cutting blade for clean edges.
Check the Roof Pitch
Roof pitch directly determines how much end lap you need, since steeper slopes shed water faster and tolerate shorter overlaps than low-slope roofs. A roof under 3:12 pitch needs 8 to 12 inches of end lap because water runoff is slower and more likely to back up against the seam. Confirm your pitch before cutting any panels, not after.
Align and Overlap the Next Panel
Set the second panel so it sits on top of the first by the full 6 inches (or more on low slopes), supported over a purlin or rafter wherever possible. Don't force a panel into place; forcing it can cause buckling down the line. Keep a chalk line running the length of the roof as a reference and check alignment every few panels rather than waiting until the run is finished.
Apply Sealant to the Overlap
Run a bead of sealant or butyl tape under the overlap before fastening it down. Water should always be able to flow downward across the seam without pooling against it. Press the seam firmly once it's in place so the sealant seats properly against both panel surfaces.
Secure and Fasten the Overlap
Drive self-drilling screws through both layers of the overlap, starting at the bottom edge and working upward. Most manufacturers recommend spacing fasteners every 12 to 18 inches, with tighter spacing around the perimeter in high-wind zones. For the full placement map by panel profile, see our guide on where to screw metal roofing. Don't over-tighten; a screw driven too far compresses the rubber washer and can distort the panel around it.
Maintain a Consistent Overlap and Check for Gaps
After installing several panels, stop and measure the overlap distance at a few points along the seam. Small inconsistencies are easier to fix early than after the whole roof is covered. Look for gaps, uneven edges, or panels that have crept out of alignment, and adjust before moving on.
Repeat Until the Roof Is Covered
Continue measuring, aligning, sealing, and fastening each panel in sequence until the entire roof surface is covered.
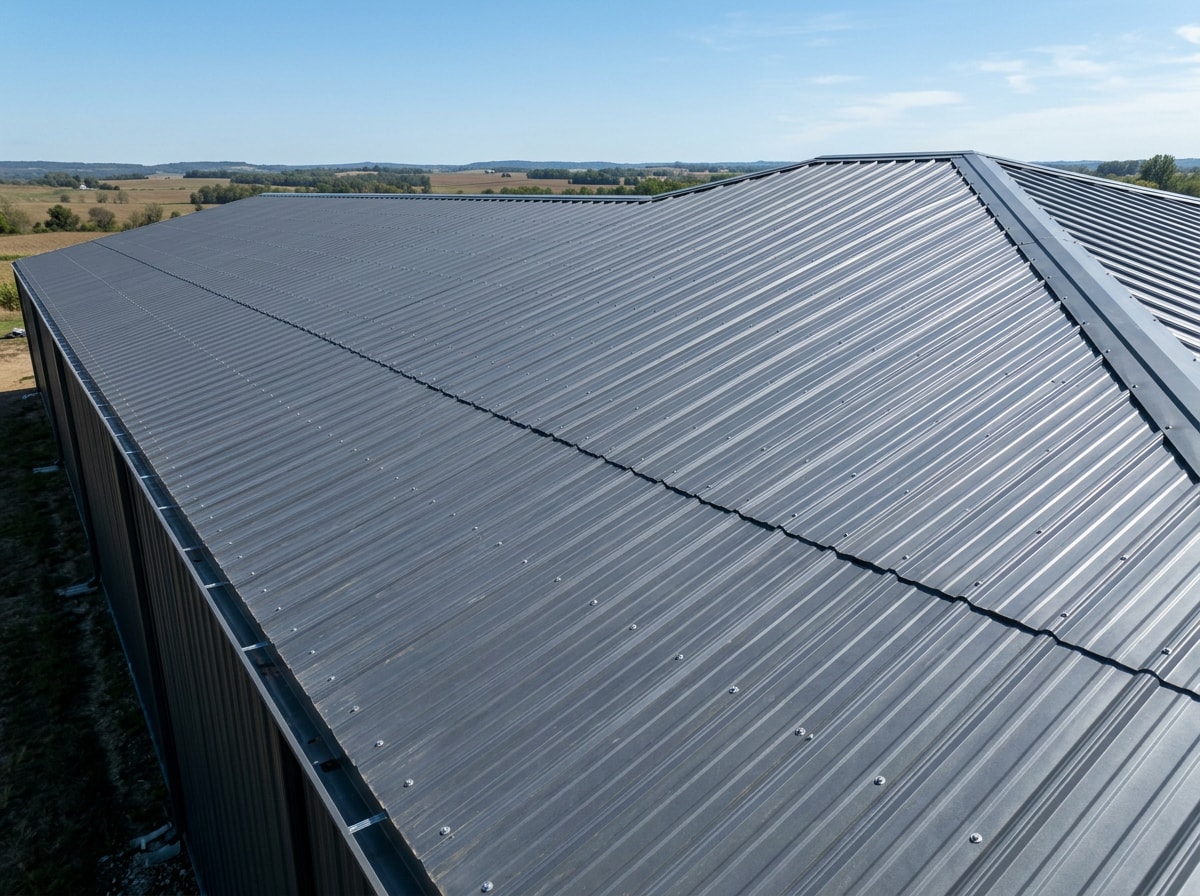
Materials Needed for Overlapping Metal Roofing Lengthwise
Gather everything before you start so you're not climbing down mid-run:
- Metal roofing panels, profile matched to your project
- Roofing screws with rubber washers for a tight, leak-resistant fit
- Butyl tape or roofing sealant for every overlap
- Drill or impact driver
- Measuring tape and chalk line
- Ladder and fall protection
- Work gloves and cut-resistant sleeves
If you'd rather skip the tool list entirely, our roof installation crews bring everything needed and warranty the work.
Common Mistakes to Avoid
Most lap failures trace back to one of three errors: an end lap that's too short, panels that are misaligned and leave gaps, or inconsistent screw placement along the seam. A 2-inch overlap, for example, might be fine for a side lap but falls well short of the 6-inch minimum a proper end lap needs, and it will leak under any real wind-driven rain. Reusing old sealant instead of applying fresh material is another shortcut that fails early, and skipping washers removes the pressure seal that keeps water from tracking in around the screw shaft.
Fastener selection also matters more than most DIYers assume. The Metal Construction Association's guidance on proper fastening tools and techniques notes that the right tool and torque setting are critical for a watertight seal and a connection that holds up to wind load, not just for ease of installation.
Improper Overlap Measurements
Misjudging the lengthwise overlap compromises durability and weather resistance, especially during heavy rainfall or snowfall when water sits against the seam longer. Measure at every panel, not just the first one, to keep the lap consistent across the whole run.
Maintenance Tips for Metal Roofing Overlap
Correct installation is only half the story. Laps need periodic attention to stay watertight for the full life of the roof.
Regular Inspections
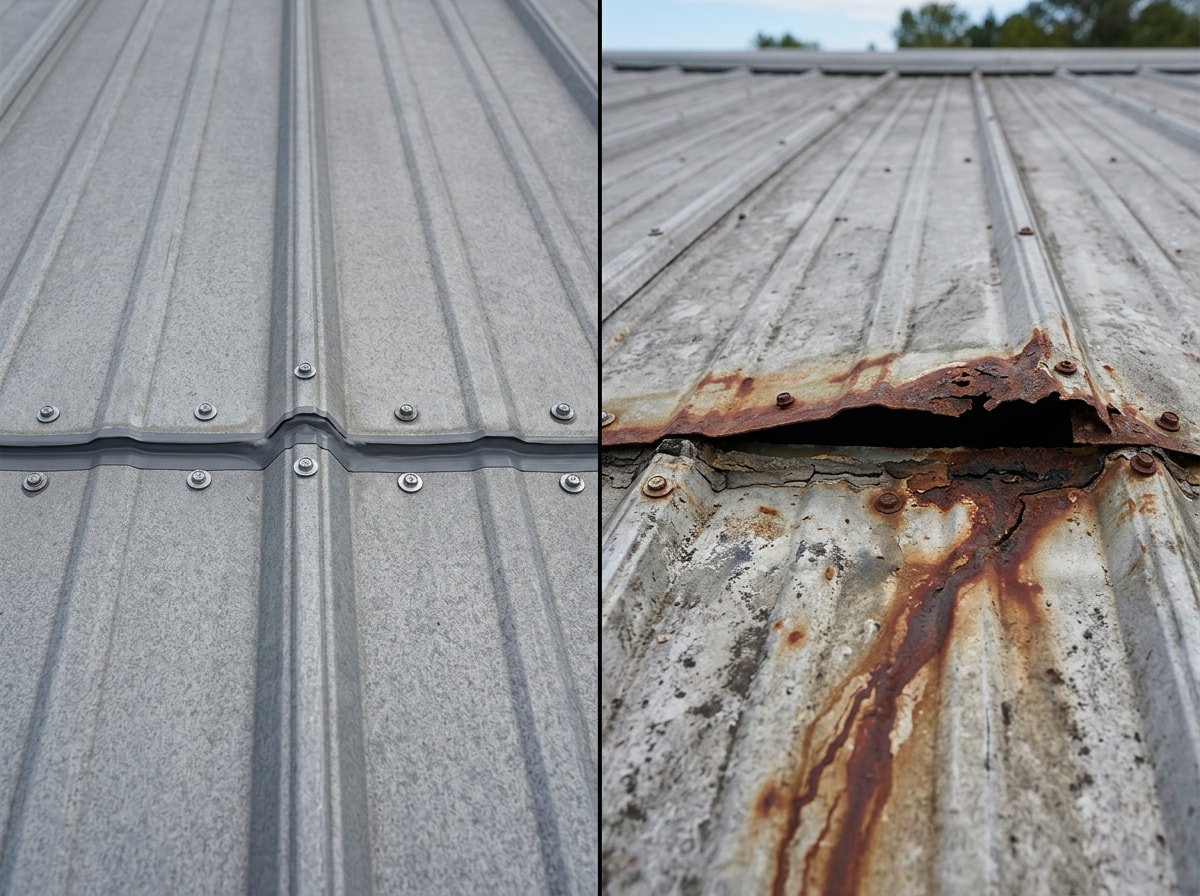
Check overlaps at least once a year for lifted edges, worn sealant, or loosened fasteners. A quick roof inspection after major storms catches a small lift in the seam before it turns into interior water damage.
Fixing Leaks and Loose Fasteners
If a lap has lifted, clean out old sealant and reseal it rather than layering new sealant over degraded material. Replace any stripped screw with a next-size-up fastener and a fresh washer rather than reusing the same hole. If you notice widespread corrosion, multiple failed seams, or you're not comfortable on the roof, a roof repair visit is worth more than a DIY patch at that point.
FAQ
What is the recommended overlap for metal roofing panels lengthwise?
Six inches minimum on roofs with a 3:12 pitch or steeper. Low-slope roofs between 2:12 and 3:12 need 8 to 12 inches with sealant at every joint. Always check your panel manufacturer's spec sheet, since profile and gauge can shift these numbers.
Can I overlap metal roofing panels without sealant?
It's possible but not recommended. Sealant or butyl tape adds a second layer of protection against water infiltration, which matters most in heavy rainfall or snowy climates where seams stay wet longer between dry spells.
How many fasteners should I use along the overlap?
Space fasteners every 12 to 18 inches along the lap as a general guideline, with tighter spacing in high-wind areas. Always check the manufacturer's installation instructions for your specific product.
Can you overlap metal roofing too much?
Yes. An excessive overlap can create a high spot that traps debris, stresses fasteners, and throws off alignment on every following panel. More isn't automatically better; match the overlap to your roof's pitch and climate.
What's the difference between a side lap and an end lap?
A side lap is the overlap between two panels sitting next to each other across the roof width, usually one full rib or corrugation. An end lap is the lengthwise overlap where one panel meets the next running up the slope, and it requires a much larger distance, 6 to 12 inches depending on pitch.
Which direction should the overlap face?
The upper panel always overlaps on top of the lower panel, and panels should be installed starting from the side away from the prevailing wind. This keeps wind-driven rain from being pushed up and under the seam.
Do I need a permit to install metal roofing myself?
Most jurisdictions require a roofing permit for a full re-roof, though requirements vary by city and county. Check with your local building department before starting, and if you're not sure where to begin, our team at Black Bear Home Exteriors can point you in the right direction.
Conclusion
A durable, watertight metal roof comes down to a handful of fundamentals: knowing the real difference between a side lap and an end lap, keeping at least 6 inches of lengthwise overlap on standard slopes, and sealing and fastening it correctly. Master those steps and you'll avoid the leaks that come from a rushed or undersized lap. If you'd rather bring in a licensed crew, from Longview to Vancouver, WA, get a free estimate and we'll handle the measuring, sealing, and fastening for you. For more on panel sizing before you order materials, check our guide on how wide metal roofing panels run.