Where to screw metal roofing decides whether a panel seals for thirty years or starts leaking after one hard winter. The short version: screws go in the flat of the panel, not the rib, at every purlin line, with tighter spacing at eaves, ridges, valleys, and overlaps. Miss that pattern and even a premium panel system fails early, so let's walk through exactly where each fastener belongs and why.
Quick Answer: Where the Screws Go
- Flat, not rib. On most modern exposed-fastener panels, screws go in the flat area near the major rib, not on top of the rib itself.
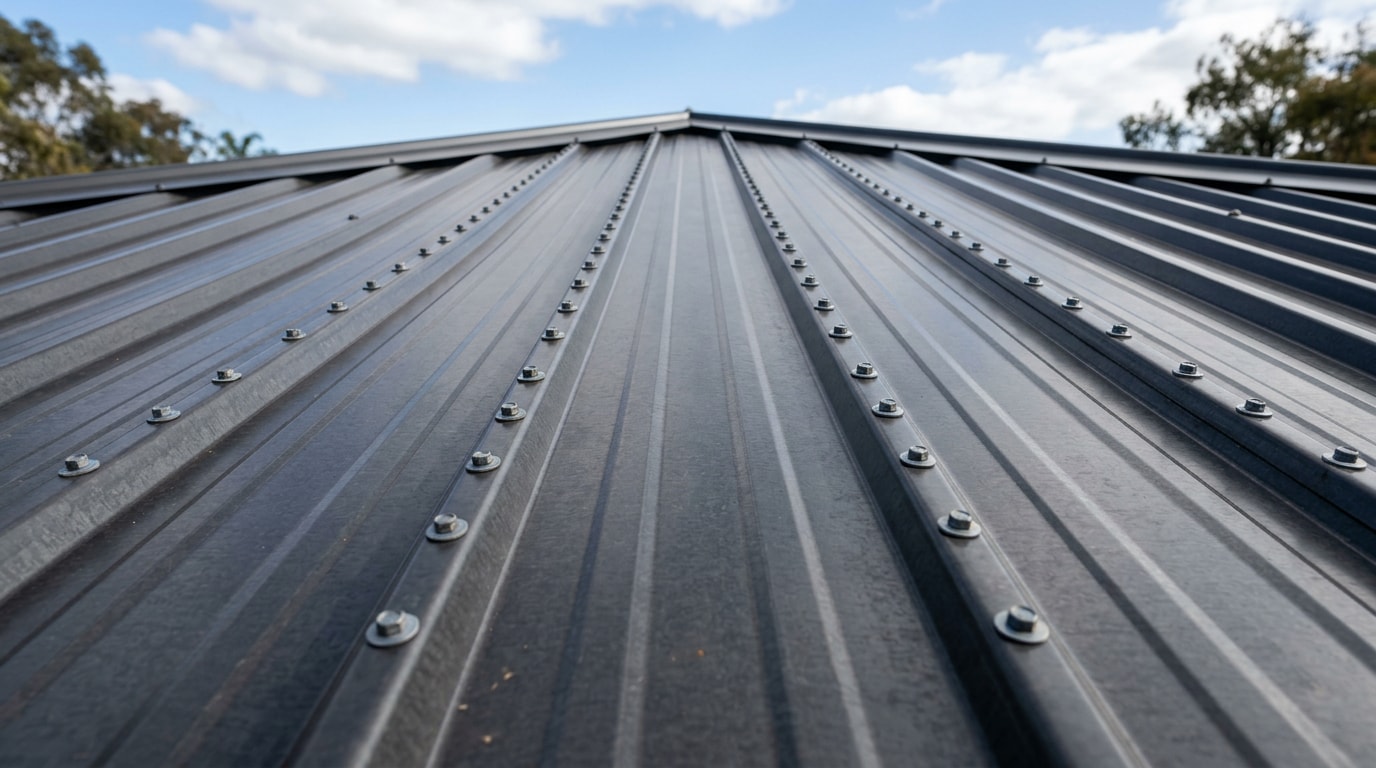
- Every second rib on internal purlins. Along the field of the roof, fasteners typically land on the crown of every second rib.
- Every rib on external purlins and overlaps. At eaves, ridges, and panel edges, spacing tightens up to every rib, sometimes doubled again in high-wind zones.
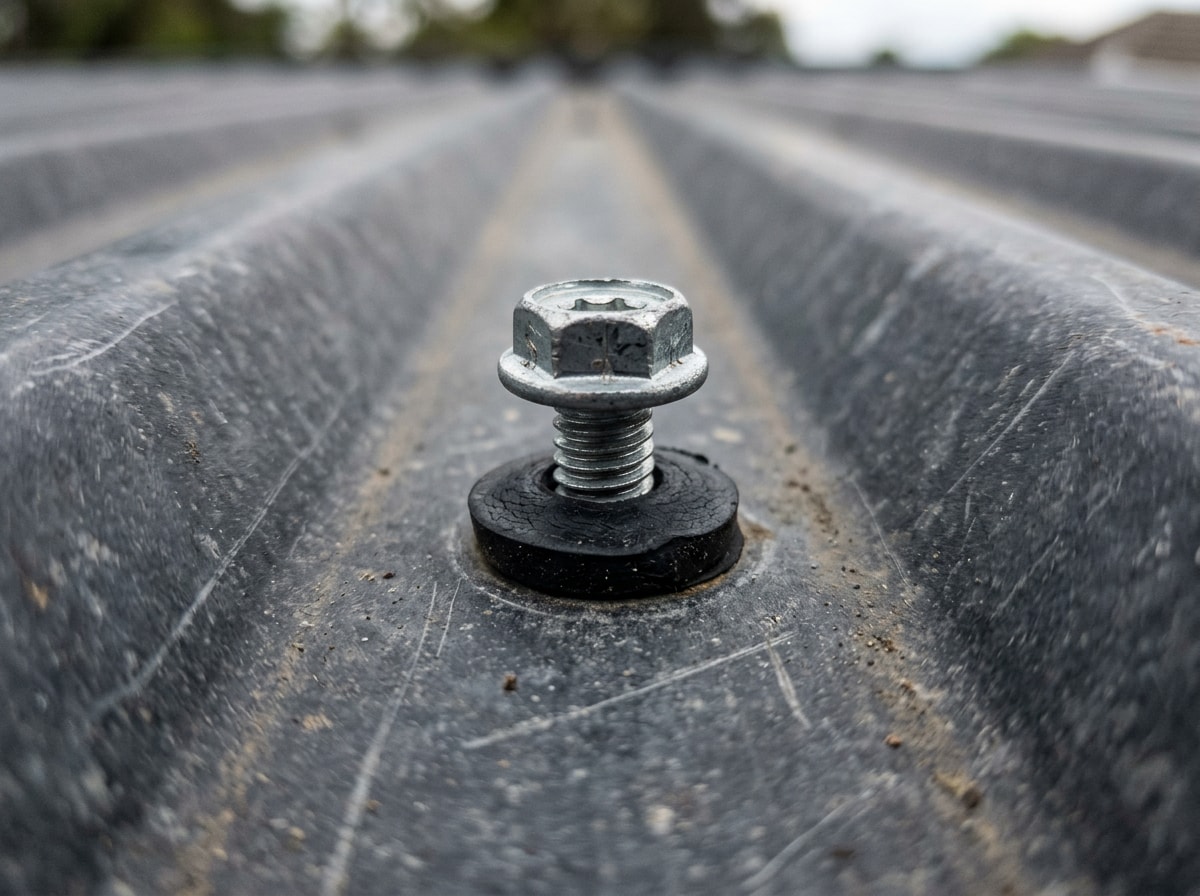
- Perpendicular, snug, never crushed. The washer should compress evenly without spinning loose or squeezing out from under the cap.
The rest of this guide breaks down why each of those rules exists, plus the screw types and torque settings that make them work.
Why Screw Placement Matters on a Metal Roof
Screw placement affects three things at once: structural integrity, weather sealing, and curb appeal. Metal roofs are known for their durability and strength, but this can be compromised if screws are not properly placed, leaving gaps or weak spots that lead to leaks and structural issues over time.
Here's what's actually at stake with each fastener:
- Structural integrity. A screw that misses the purlin or sits in the wrong panel zone can't carry its share of wind and snow load.
- Weather protection.
Properly placed screws help create a tight seal between metal roofing panels, preventing water and moisture from seeping through, which matters most in areas with heavy rainfall or snowfall.
- Appearance.
Screw placement also affects the overall appearance of a metal roof; screws that aren't evenly spaced or aligned create an unattractive, uneven look.
On our own crews at Black Bear Home Exteriors, the callback pattern is almost always the same: a roof with crooked or rib-placed screws starts weeping at the fastener line within a season or two, long before the panel itself shows any wear. If your roof is already past that point, a roof inspection will tell you whether it's a re-fastening job or a full roof repair.
Screw Types for Metal Roofing
Before you decide exactly where a screw goes, you need to know which screw is going in. Selecting the correct screws for the installation matters, and it's essential to distinguish between metal-to-metal and metal-to-wood roofing screws, since each is designed for specific applications.
Metal-to-Metal Screws
These fasten panels directly to structural metal purlins. Most feature a self-drilling tip that cuts its own hole and threads in one pass, no separate pilot hole needed. Because the tip drills and taps at once, predrilling into metal purlins isn't recommended; a slightly misaligned pilot hole can make the self-drilling screw walk or bind instead of seating straight.
Metal-to-Wood Screws
These secure panels to wooden purlins or solid decking, with a coarser thread built to bite into wood fiber instead of cut through metal. One detail installers often overlook: zinc-plated fasteners and bolts should not be used with any preservative-treated wood, especially with waterborne treatments. That single mismatch is enough to cause premature corrosion at every screw head on the roof.
Because profiled metal panels rely on mechanical fasteners to secure them to the structure, selecting the correct fastener type for the application is critical to a strong, weather-tight connection. The Metal Construction Association's technical bulletin on fastener compatibility with profiled metal panels is a useful reference if you're specifying hardware for a specific climate or coastal environment. For a full walkthrough of putting panels down correctly once you've picked the right screws, see our guide on how to install metal roofing.
Rib vs. Flat: Where the Screw Actually Goes
This is the debate that generates the most confusion, and it has a clear answer for most residential panels.
Screw the flat, not the rib, for the majority of modern exposed-fastener metal roofs. For ABM Panels and many modern exposed-fastener metal roofing systems, the recommended best practice is to fasten the screw in the flat of the panel, not on top of the rib. Flat placement compresses the washer evenly against a solid bearing surface, which improves both the seal and the holding power.
The case for the rib isn't baseless. Installing screws on the ribs is often preferred for its ability to minimize water and debris contact, but this method poses a risk of inadequate gasket compression and potential screw pull-out during high winds. That tradeoff is why the rib method has fallen out of favor on most modern panel profiles.
| Factor | Rib Placement | Flat Placement |
|---|---|---|
| Water exposure | Elevated, away from standing water | Slightly lower, sealed by washer |
| Washer compression | Uneven on curved surface | Even, full contact |
| Wind performance | Higher pull-out risk | Better uplift resistance |
| Appearance | Less visible from ground | Clean, consistent lines |
| Best fit | Older, thicker-gauge panels | Most modern exposed-fastener panels |
Why Flat Placement Seals Better Today
With the right screw, the right placement, and the right amount of compression, fastening in the flat lets the washer sit flatter and seal more evenly. That flat seal delivers three concrete benefits: the washer compresses evenly, the screw grips with a straighter pull into the purlin, and the fastener resists loosening as the panel expands and contracts through daily temperature swings.
Why the Rib Method Was Used in the Past
The rib method didn't come out of nowhere. For years, many metal roofs were installed with nails or older fastener systems, and since the rib was higher than the flat, that's where installers put the fasteners to keep them farther away from water running down the roof. That made sense with the materials and methods used at the time, but metal roofing best practices have changed. Modern washered screws are designed to compress against a flat surface, so the old logic no longer applies to most current panel profiles.
Screw Placement by Roof Zone: Purlins and Overlaps
Beyond the rib-versus-flat question, fasteners also need to land in the right spot relative to purlins and panel overlaps, and that pattern changes as wind exposure increases across the roof plane.
Internal (Middle) Purlins
Along internal purlins, fasteners are normally placed on the crown or crest corrugation of every second rib in the horizontal direction. This spacing gives the panel solid structural support between the eave and the ridge without over-fastening the field of the roof. In high-wind zones, that spacing often tightens to roughly half the standard interval.
External Purlins
At end and external purlins, fasteners are normally placed on the crown or crest corrugation of every other rib in the horizontal direction , rather than every second rib. This denser pattern reinforces the roof perimeter, where uplift forces concentrate hardest during a storm.
Overlaps and High-Stress Zones
Panel overlaps need their own attention, with screws spaced evenly along the length of every seam. Chimneys, vents, and valleys typically call for extra fasteners as added insurance against leaks. As one manufacturer's own install guide illustrates, a typical fastening schedule calls for around 40 screws per square for 2-foot-wide panels, roughly doubling to about 80 for tighter high-wind schedules , which gives you a concrete benchmark to check your own installer's fastening count against.
Corrosion resistance matters just as much as spacing in this zone. Metal roofing should be installed with corrosion-resistant screws rather than nails, with stainless steel and hot-dipped galvanized fasteners offering the best resistance and requiring less maintenance over time. FEMA's wind-resistant roofing recovery advisory also notes that homes using tighter fastener spacing at roof edges held up better in past storms than those that skipped the extra rows.
If your roof is heading into a full tear-off rather than a re-fastening job, our roof installation and roof replacement teams follow manufacturer fastening schedules on every job, not a generic screw count.
Getting the Compression Right
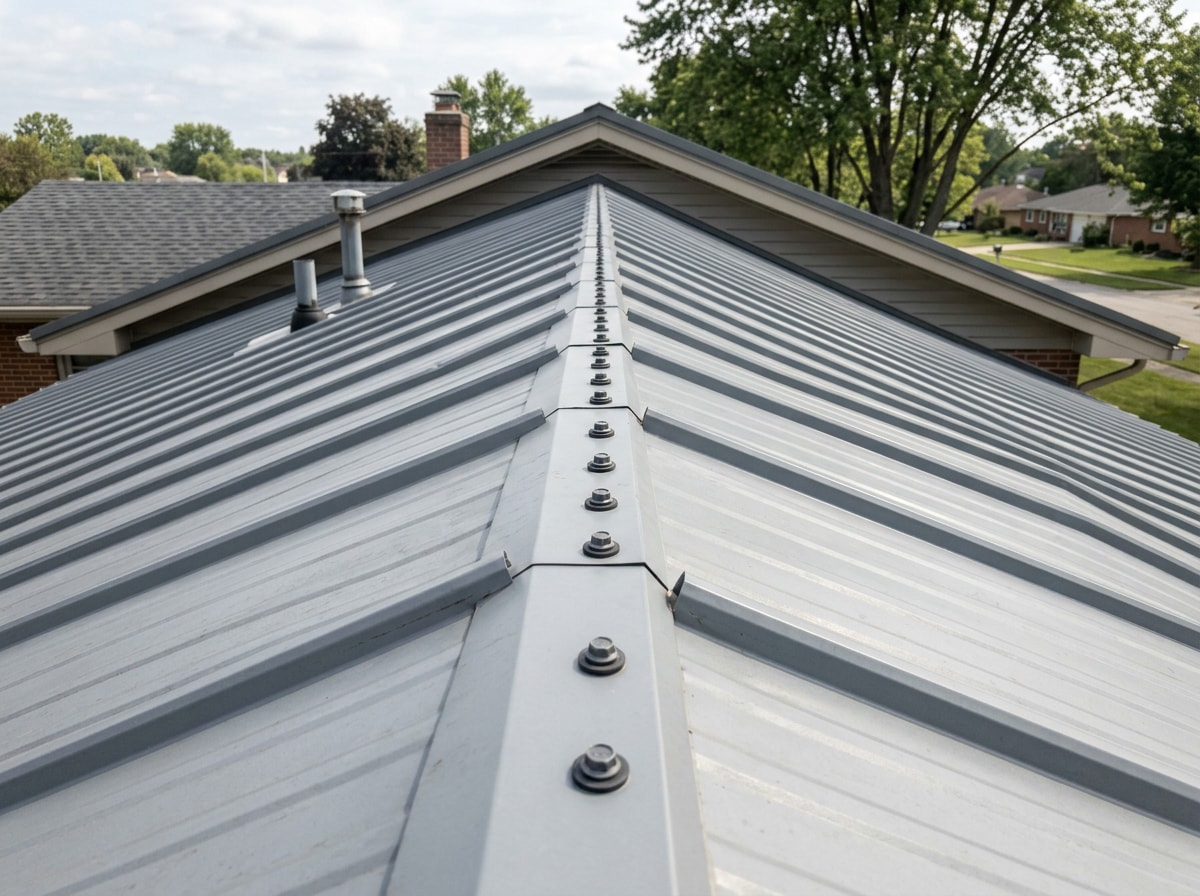
Placement only works if the screw is driven correctly. Apply sufficient torque to seat the washer, but do not overdrive the fastener. A properly seated screw leaves the washer compressed evenly to the edge of the cap, not spread out past it and not still loose enough to spin.
Two failure modes to watch for:
- Overtightened: the washer bulges out from under the cap or cracks, breaking the seal it's supposed to create.
- Undertightened: the washer sits loose, leaving a gap for water to work its way around the shank.
Working at height to check or replace fasteners carries real fall risk, which is worth taking seriously even on a low-slope garage or shed roof. Roofers installing standing seam metal roofs risk permanent injury or death from falls, since even experienced roofers are exposed to unpredictable hazards from wind gusts, loose materials, and surfaces that become slick when wet, and taking appropriate fall protection measures reduces risk. That's one more reason most homeowners call a licensed crew for anything beyond a quick fastener check.
Common Screw Placement Mistakes
Even a correct rib-vs-flat decision can fail if these details get skipped:
- Using the wrong screw type. Drywall screws and generic hardware store fasteners lack the coating and washer design to survive outdoors.
- Driving screws at an angle.
Fasteners must be driven perpendicular to the roof surface to prevent an oval hole, since an angled entry creates a larger penetration point than the screw shaft, which guarantees a potential leak path past the washer.
- Skipping the manufacturer's fastening schedule. Generic spacing rules are a starting point, not a substitute for the panel-specific chart.
- Ignoring corrosion compatibility. Mixing the wrong metal fastener with treated lumber or dissimilar cladding accelerates rust at every screw head.
- Leaving crooked, uneven lines. Beyond looking sloppy, misaligned screws are often the first visible sign of a leak that hasn't shown up inside yet.
If you're noticing any of these on a roof you didn't install yourself, an emergency roof repair call is cheaper than waiting for the leak to reach the deck.
FAQ
Should you screw a metal roof on the rib or the flat?
Most modern exposed-fastener panels perform better with screws in the flat, since flat placement compresses the washer evenly and improves both holding power and wind resistance. Rib placement was standard on older nail-fastened systems but carries a higher risk of uneven gasket compression and pull-out today.
How many screws do I need for metal roofing?
Screw count follows the manufacturer's fastening schedule, which sets spacing along internal purlins, external purlins, and overlaps based on panel profile and wind exposure. As a rough benchmark, some manufacturer install guides call for around 40 screws per square on standard 2-foot-wide panels, with denser schedules in high-wind areas.
How far apart should metal roof screws be?
Spacing follows the purlin pattern: roughly every second rib in the field of the roof, tightened to every rib (or closer) at eaves, ridges, and overlaps. Exact spacing still depends on the published fastening schedule for the panel in use.
How tight should metal roofing screws be?
Screws are tight enough once the washer compresses evenly to the edge of the screw cap without spreading past it. Overtightening squeezes the washer out and breaks the seal; undertightening leaves a gap for water. Apply enough torque to seat the washer, then stop.
Do metal roofing screws go at the ridge or the valley?
For exposed fastener systems, the screw should generally be placed in the flat valley of the panel where it sits flush against the substrate, which provides the most secure structural anchor point against the purlin or decking. Some manufacturers call for the high rib near ridges for water drainage, but valley (flat) placement is the more common recommendation for a durable seal.
What size screw do I need for metal roofing?
Screw length depends on what's underneath the panel. Metal-to-wood screws typically run 1 to 1.5 inches to bite into solid decking or purlins, while metal-to-metal screws are usually shorter since they only need to clear the panel and the structural member. Always match the length to the manufacturer's spec sheet for your specific panel and substrate.
Getting screw placement right on a metal roof isn't complicated once you know the rule set: flat over rib on most panels, tighter spacing at edges and overlaps, and correct torque every time. If you'd rather have a licensed crew handle it, Black Bear Home Exteriors installs and repairs metal roofing across Longview, Vancouver, Kennewick, and the rest of the Southwest Washington Metro area. Our roofing contractor team can walk your roof and tell you exactly what's holding, what's not, and what it'll take to fix it. Get a free estimate before your next storm season.