Learning how to install metal roofing takes more precision than muscle, and a rushed job invites leaks and voided warranties fast. Steel panels can last decades longer than asphalt shingles when every layer goes down in the right order, but skip a step and you're looking at a multi-week repair instead of a weekend win. This guide walks through the exact sequence a licensed installer follows, from picking a panel material to setting the ridge cap, so you know where DIY ends and a professional call begins.
At Black Bear Home Exteriors, we get called out to fix more first-panel mistakes than any other issue on DIY metal roofs. A panel that's off-square by even a quarter inch at the eave throws off every seam that follows it, and that single detail is where this guide spends the most time.
Types of Metal Roofing Panels
Before any panel goes on the roof, you need to decide what it's made of. Material choice affects everything downstream: the screws you buy, the tools you need, how much the job costs, and how many decades the roof will last.
Here's a rundown of the four metal roof types you're most likely to install on a residential project.
Tin Roofing
Tin roofing is largely a legacy term today. Few modern panels are made from actual tin.
Historically, tin roofs were sheets of steel or iron coated with a thin layer of tin for rust resistance, giving them a distinctive shiny gray finish that dulls with age.
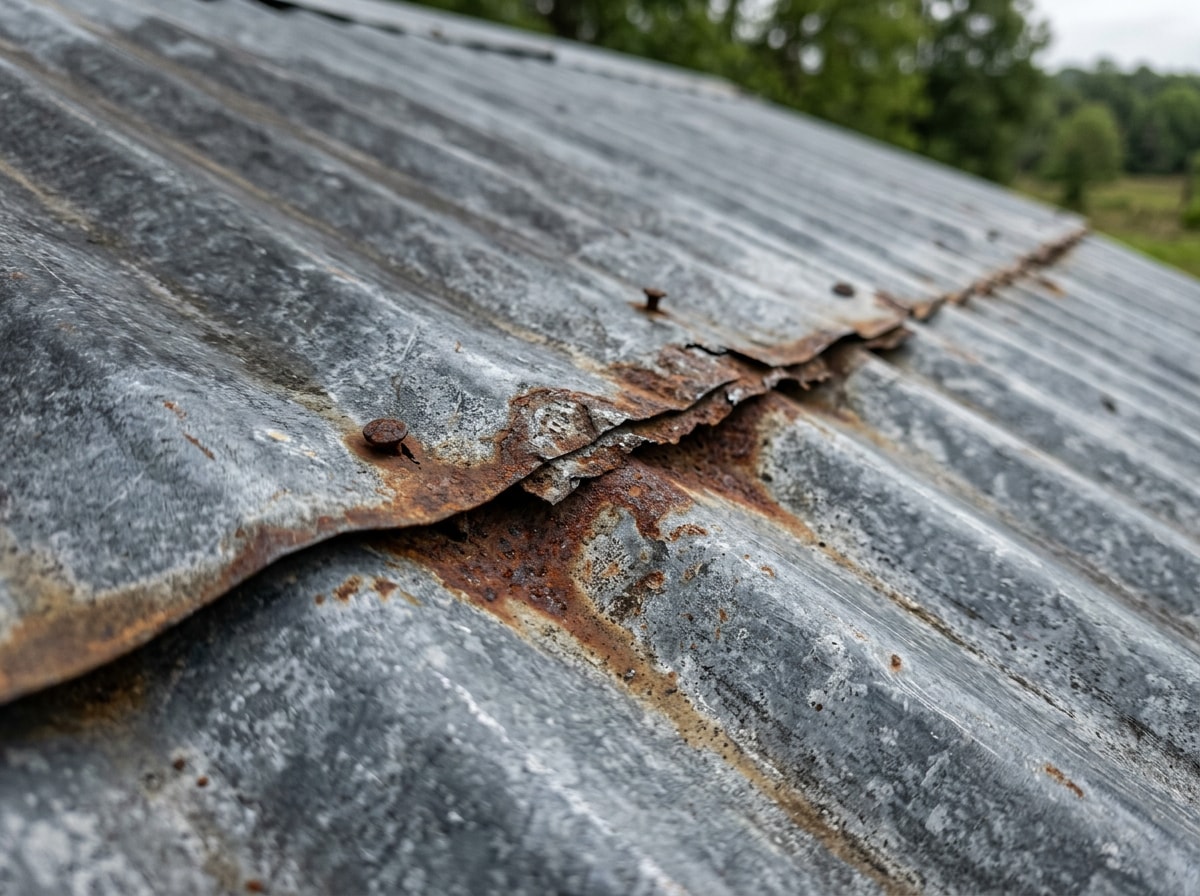
As that tin coating wears thin over decades, the base metal underneath can be exposed to moisture and start rusting. When people search for tin roof installation today, they usually mean modern steel panels marketed under the "tin roof" name, not actual tin-clad sheets. If you like the classic look, ask suppliers what alloy and coating a panel actually uses before you buy it.
Zinc Roofing
Zinc roofing panels develop a self-healing patina, a soft gray oxide layer that fills in scratches and small scuffs over time. This natural weathering process is part of what gives zinc its reputation for durability, with a potential lifespan of 60 to 100 years under favorable conditions, though results vary by region and maintenance.
Despite that longevity, zinc panels are uncommon on DIY residential jobs. Zinc is soft enough to dent, needs specialized detailing at seams, and typically costs more upfront than steel or aluminum, better suited to a professional installer with zinc-specific experience.
Steel Roofing
Steel is the most common material for DIY metal roofing projects, and it's the metal this guide focuses on for the installation steps ahead. Most steel panels are coated with either galvanized zinc or Galvalume, a zinc-aluminum alloy. The galvanized vs. Galvalume choice generally comes down to Galvalume resisting corrosion longer while galvanized coatings cost less.
Reflective steel coatings can also cut attic heat gain. The U.S. Department of Energy recommends installing a metal roof painted a light color, not with a clear coating , to get the full benefit of a reflective surface.
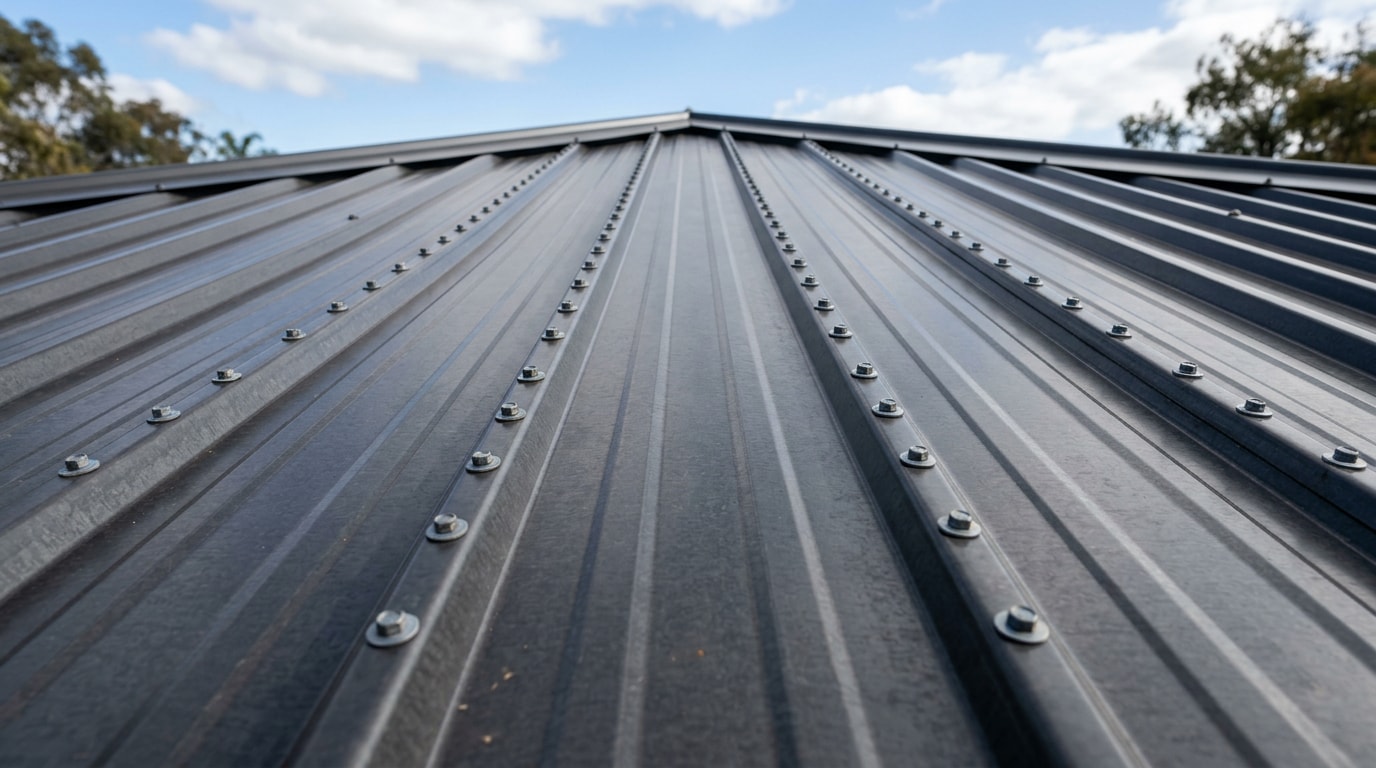
A corrugated steel roof is the easiest profile for a first-time installer to handle, since the wavy profile hides minor fastening imperfections better than a flat standing-seam panel. Here's how the four main options stack up:
| Material | Typical Lifespan | Cost Tier | Weight | Best-Use Climate |
|---|---|---|---|---|
| Steel | 40–70 years | Low–Mid | Moderate | Most climates |
| Aluminum | 40–70 years | Mid | Light | Coastal/humid |
| Tin (steel-tin) | 20–50 years | Low | Moderate | Dry, moderate |
| Zinc | 60–100 years | High | Moderate | Temperate |
These ranges are general estimates. Actual performance depends on coating quality, installation quality, and local weather exposure. If you're weighing standing-seam against corrugated once you've settled on steel, our roof installation team can walk you through the tradeoffs for your specific roofline.
Aluminum Roofing
Aluminum roofing panels naturally resist corrosion, which makes them a strong pick near salt air. Unlike steel, aluminum won't rust; it forms its own protective oxide layer instead, so it holds up well in humid or coastal environments where steel coatings can eventually break down.
Aluminum is also lighter than steel, which matters on older structures or additions with limited load capacity. The tradeoff is a higher material cost and a slightly softer surface that dents more easily under foot traffic or hail.
Tools & Materials You'll Need
Installing a metal roof requires a short list of specialized tools and a longer list of materials. Gather everything before you climb the ladder so you're not making a supply run mid-project.
Tools:
- Tape measure, for panel and section measurements
- Chalk line, to keep the first row square
- Metal snips, for cutting panels and trim
- Cordless drill or impact driver, for driving screws without stripping them
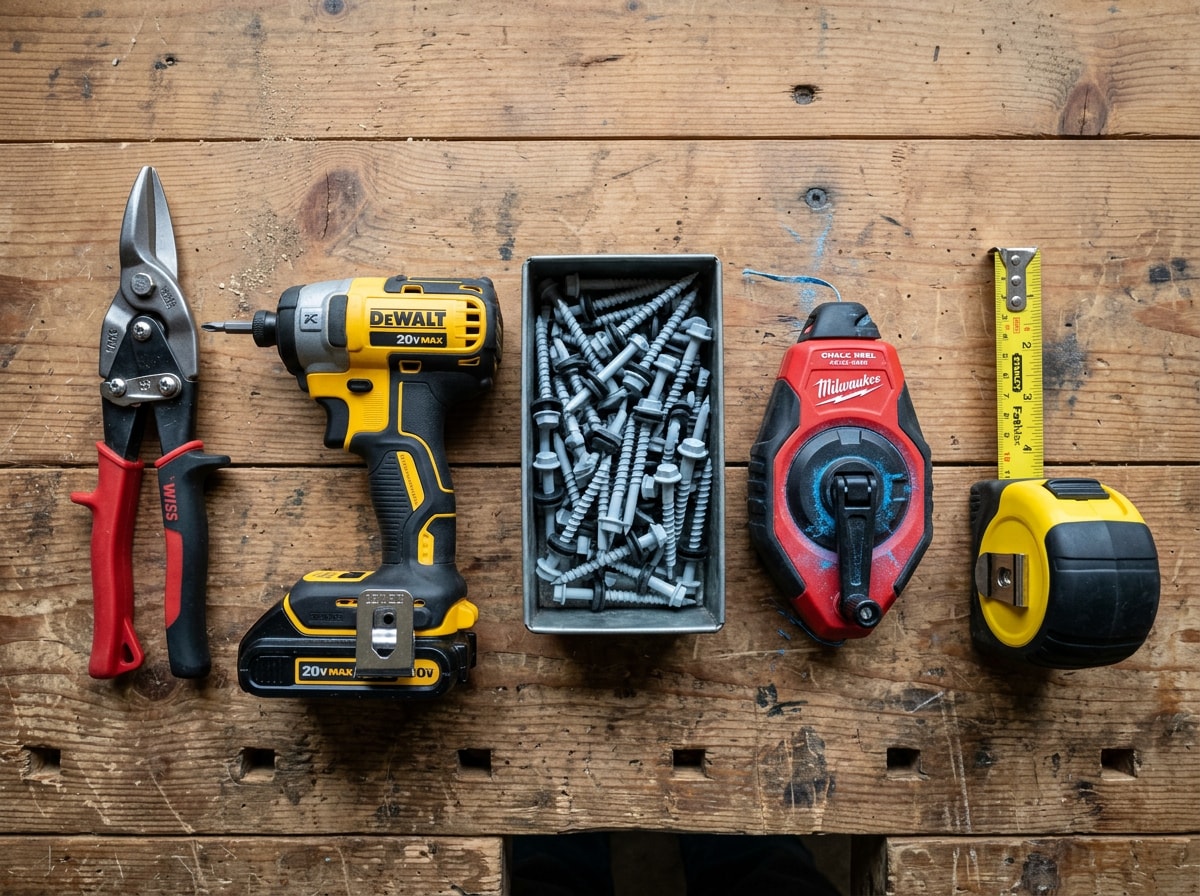
Materials:
- Metal panels
- Underlayment
- Roofing screws with rubber washers
- Flashing
- Ridge cap
- Foam closure strips
- Exterior-grade sealant
Once you've got a full materials list built, a call to our roof installation crew can price it out and confirm you're not missing a piece. Get a free estimate before you order, and you'll know exactly what the job costs before it starts.
Safety Considerations
Gloves and safety goggles are non-negotiable for the entire job. Sheet metal edges and cut burrs cause more injuries than any other part of installation. Plan to work with one or two helpers, and add anchored fall protection any time you're on a pitched roof.
Run through this checklist before you climb up:
- Clear overhead electrical wires and low tree branches
- Secure the ladder at both the base and where it meets the roofline
- Anchor fall protection lines before you start working
- Wear slip-resistant, roof-rated safety shoes
OSHA's fall-protection standard applies to any walking or working surface with an unprotected edge six feet or more above a lower level , and the agency requires guardrails, safety nets, or a personal fall-arrest system to meet it. Following that on a steep or high roof isn't optional.
If your roof pitch is steep, the framing looks questionable, or you're not confident using fall-arrest gear, hiring a professional is the safer call. Contact us if you'd rather hand the climbing off to a licensed crew.
Measure the Roof
Calculate the square footage of each roof plane separately by multiplying length by width, then add the sections together. Metal panels are sold by coverage width, so knowing your total square footage lets a supplier calculate exact panel counts.
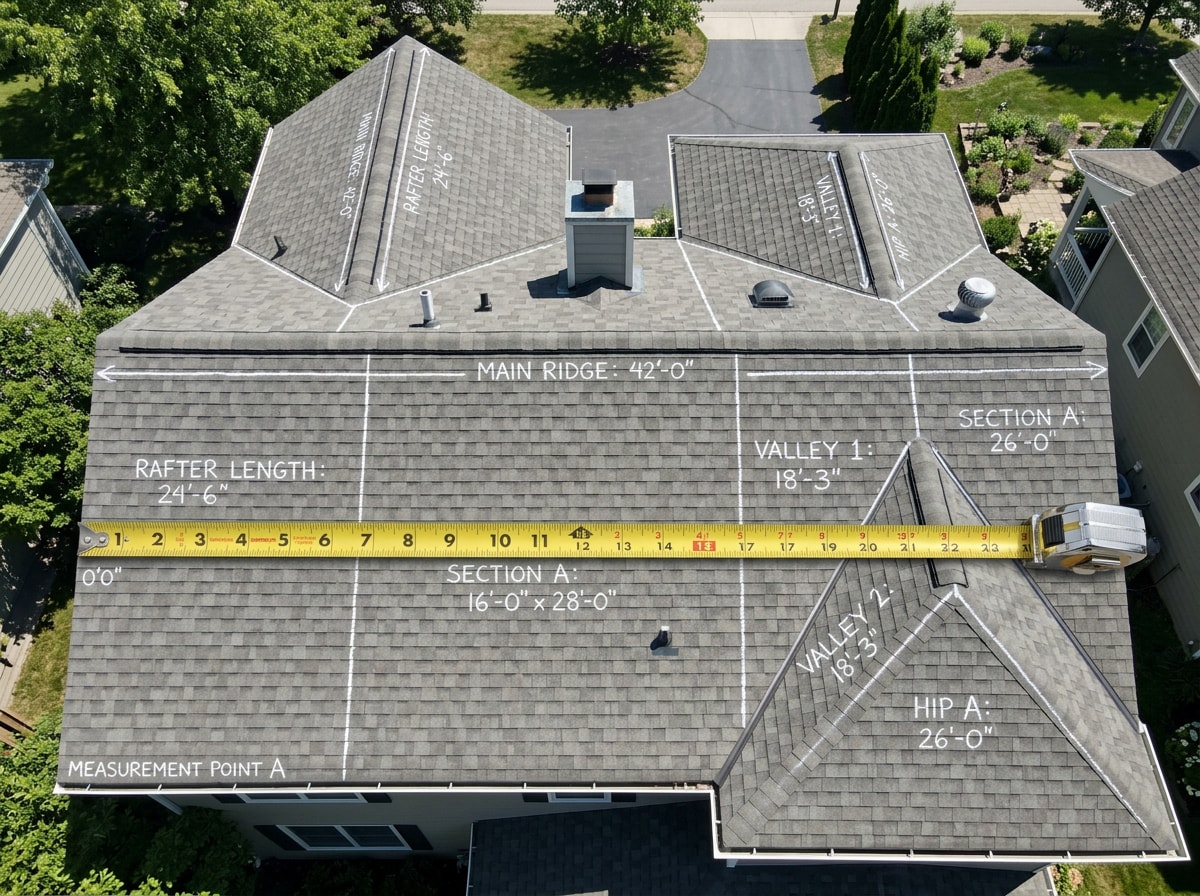
Order 10 to 15 percent extra material to cover cutting waste, overlap, and mistakes. Running short mid-project usually means a delayed order and a mismatched dye lot. If you'd rather skip the math, a licensed roofing contractor can turn your rough measurements into an accurate panel order in one visit.
Remove the Old Roofing
Strip shingles, tiles, or old panels down to bare decking so you can see what you're actually building on. Walk the entire deck and check for rot, soft spots, delamination, or sagging. Any of these need repair before a single metal panel goes down.
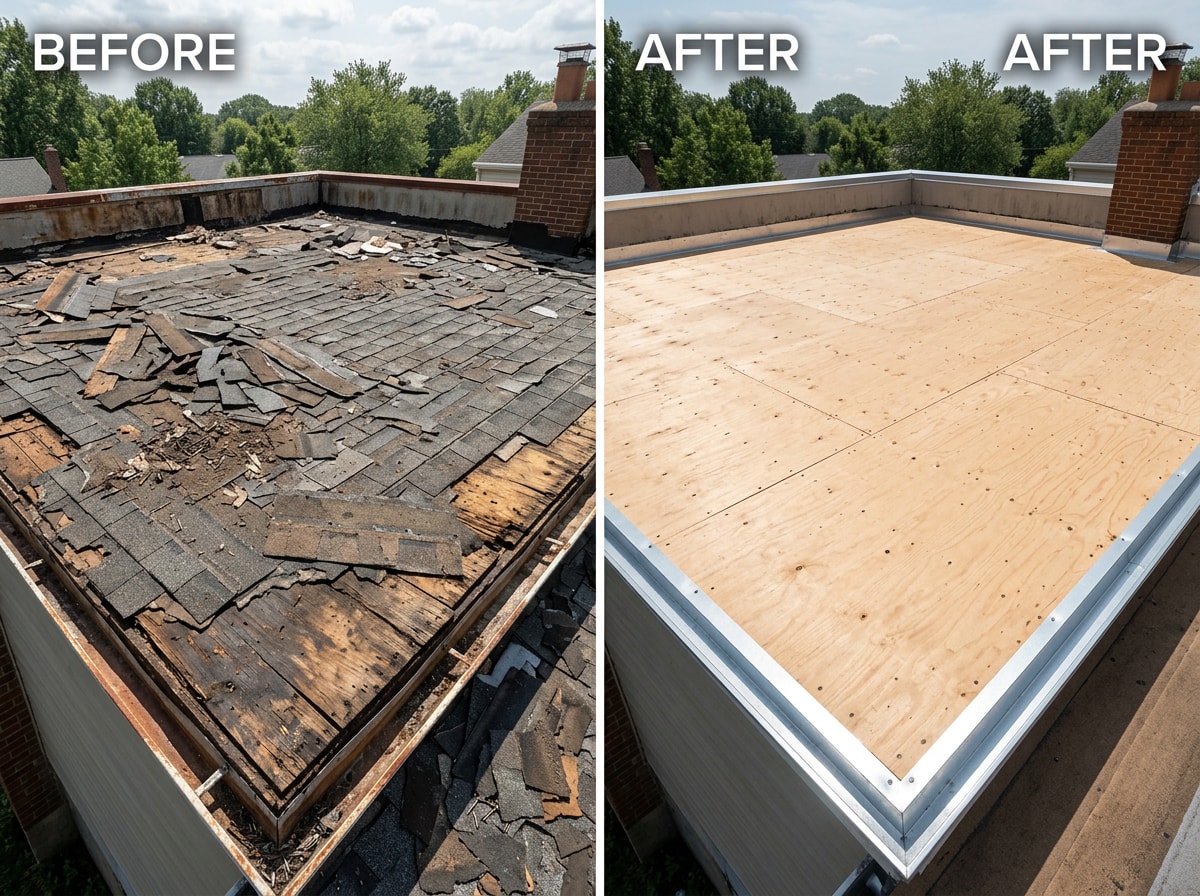
Whether you can install a metal roof over shingles instead of tearing off depends on your local building code and the shingle layer's condition. It's often allowed for a single, flat, damage-free layer, but new construction always starts from bare decking. If you're not sure your deck will pass, a professional roof inspection will tell you before you order panels, not after. Once the deck passes, install a waterproof underlayment before moving forward.
Install the Underlayment
Roll the first layer of underlayment directly over the inspected deck, starting at the lowest edge and working up. A self-healing ice-and-water membrane works particularly well on shallow-pitch roofs, since it seals tightly around fastener penetrations.
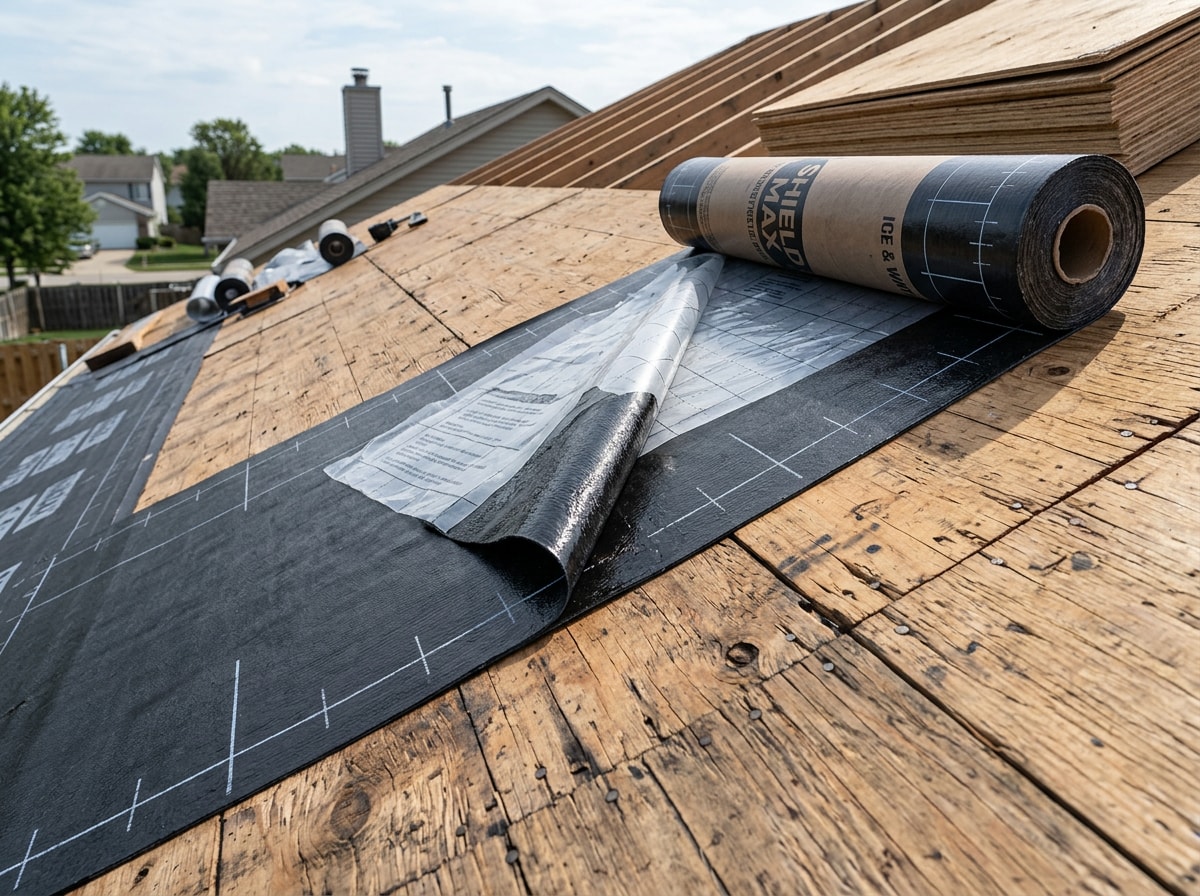
The hardest part is keeping each course flat and wrinkle-free while you unroll it and peel away the adhesive backing. A second set of hands makes this much easier.
Keep a six- to eight-inch overlap between each row and the one below it, then cut the underlayment flush at the edges and pull off any remaining adhesive backing. Minimum slope and underlayment requirements vary by code and manufacturer. Most manufacturers recommend a minimum slope of 3:12 for standard exposed-fastener panels, and the 2024 IRC sets 1:12 as the minimum for structural standing-seam systems and 3:12 for metal shingles , so check the current International Residential Code or your panel manufacturer's spec sheet before you commit to a layout.
Install the Eave Trim (Drip Edge)
Fasten eave trim tight against the fascia, securing it to the roof deck over the underlayment with one-inch roofing nails spaced along its length. In warmer climates, installers sometimes reverse the order and set the eave trim before the underlayment; check regional practice or your manufacturer's instructions.
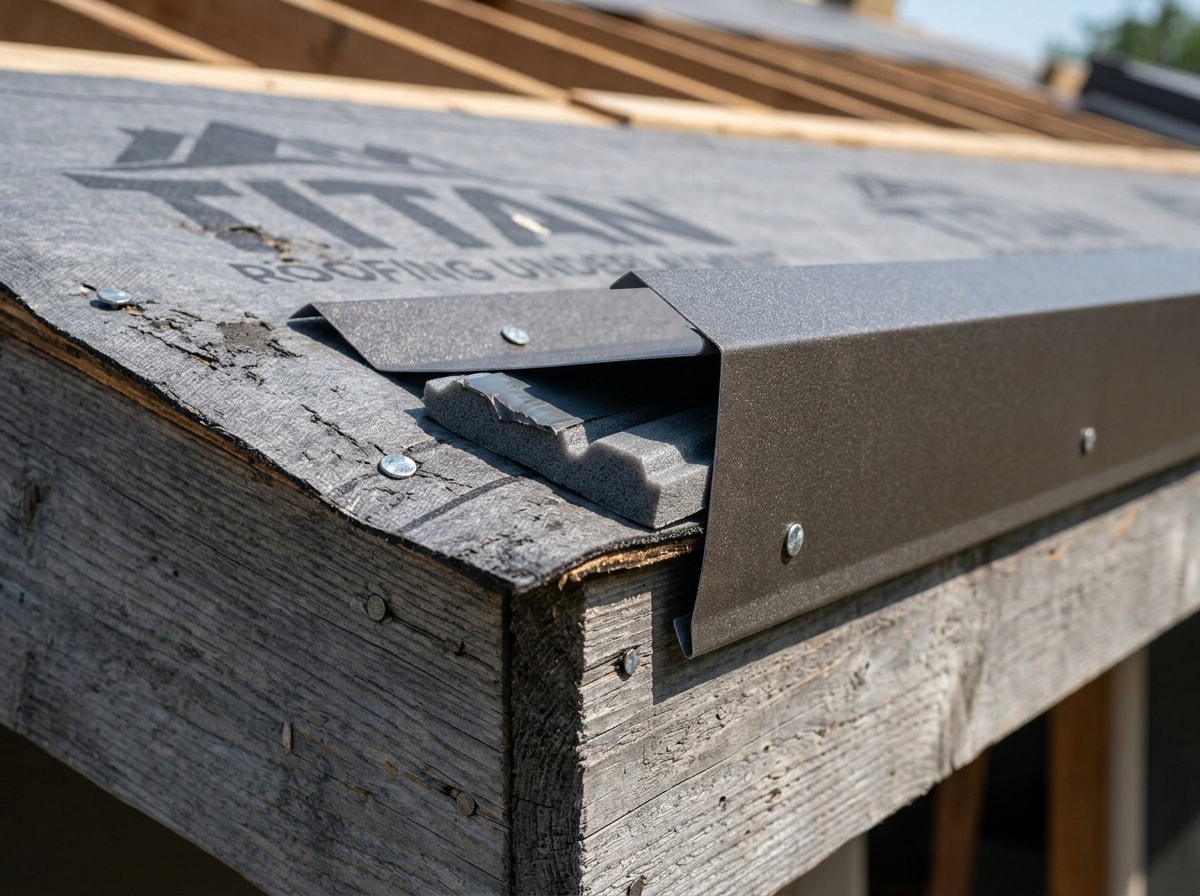
While you're at the eave, set your foam closure strips. These are shaped to match the corrugated underside of the panel and sit about one inch back from the eave edge, held down with butyl tape and topped with a bead of sealant. The first panel row will overhang this edge by about one inch once it's set in place.
Install & Fasten the Metal Panels
This stage is the core of how to install metal roofing. Everything before it is prep, and everything after it is trim. A crooked first panel throws off every seam, overlap, and fastener line that follows, so slow down here even if you've moved quickly through everything else.
Set the First Panel
Start at the end of the roof opposite the prevailing wind direction, so later panels overlap into the wind rather than against it. Snap a chalk line square to the eave as your reference, then align the first panel's edge to that line, letting it overhang the eave by one to two inches.
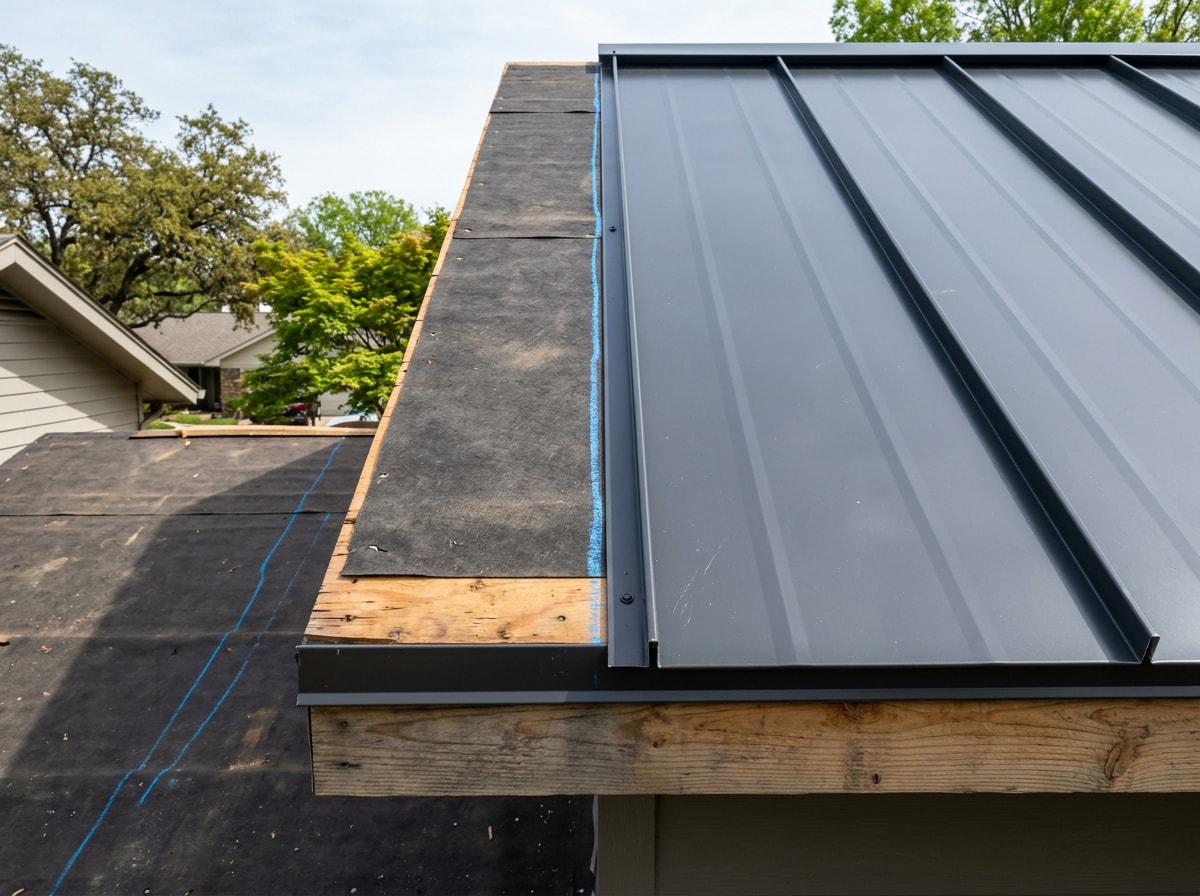
Set the panel loosely at first. Don't drive final screws yet. Check the alignment against your chalk line and the eave overhang on both ends before you commit, since this panel sets the baseline for the rest of the roof.
In the installs our crew runs across Longview and Vancouver, a crooked first panel is the single most common callback we get on jobs someone else attempted. Fix that one detail and the rest of the roof tends to go down clean.
Fasten the Panels
Drive screws so they seat flat against the panel. A crooked screw compresses unevenly and won't seal, no matter how tight you drive it. Tighten each one just enough to compress the rubber gasket to the edge of the screw head, creating a proper seal. Over-tightening crushes the gasket, and under-tightening leaves a gap water can find.
Screw spacing and torque vary by panel profile and manufacturer, so check the Metal Construction Association's installation manual or your panel maker's fastening chart for exact spacing before driving screws across the whole roof. Clean up metal shavings and drill burrs as you go. Left on the panel surface, they rust and leave streak marks that are nearly impossible to remove later.
Install the Gable Trim
Gable trim installation happens only after every panel is fastened. It cleans up the panel edge and stops wind-driven rain or snow from working under the panels and siding.
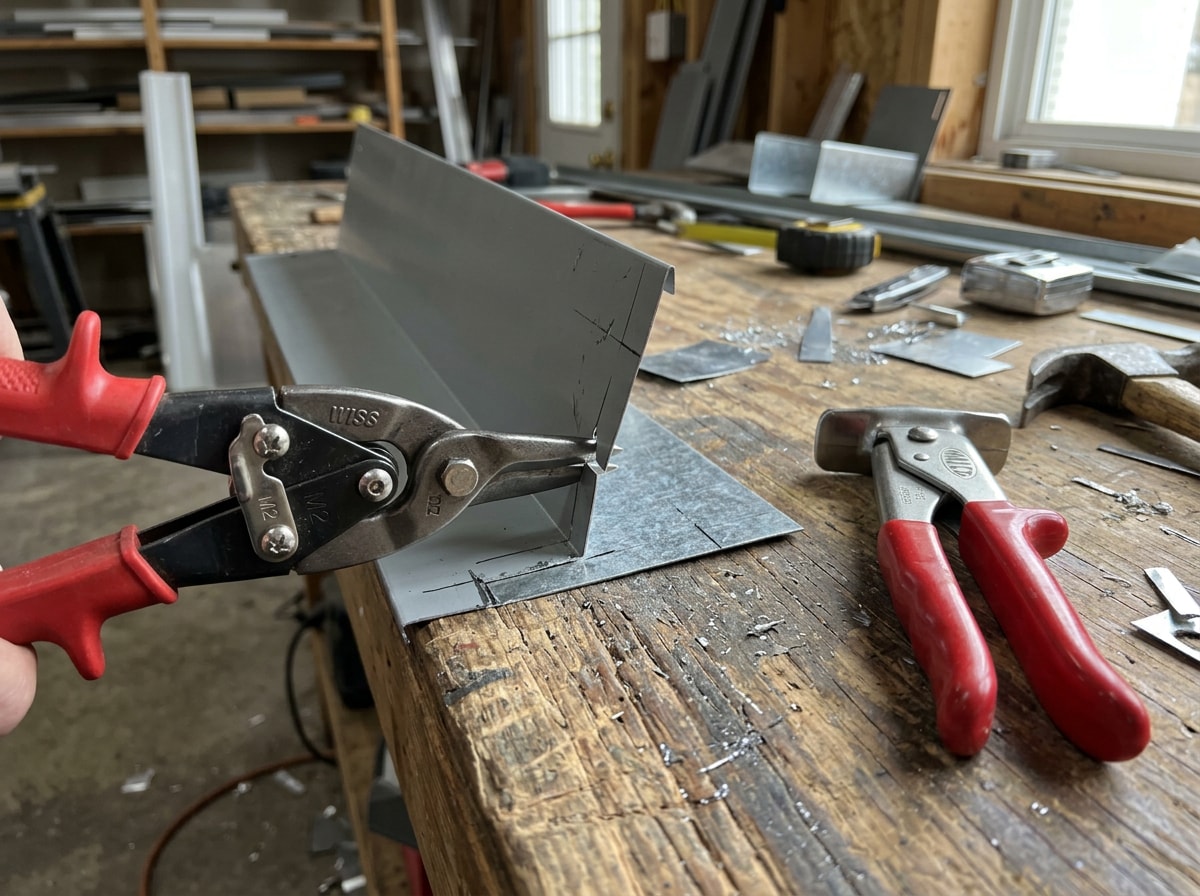
Run a strip of butyl tape along the underside where the trim meets the flat part of the panel before setting it. Cutting gable trim takes technique: bend the leading end to wrap around the corner, then make one-inch cuts with aviation snips at each bend to form small tabs, and fold those tabs in with a hand seamer. These cuts vary by shape and roof angle, so test on a scrap piece first.
Install the Ridge Cap
Ridge cap installation is the last piece of the job, sealing the peak where two slopes meet. Foam closure pieces go underneath first, blocking wind-driven rain, snow, and pests from getting under the trim.
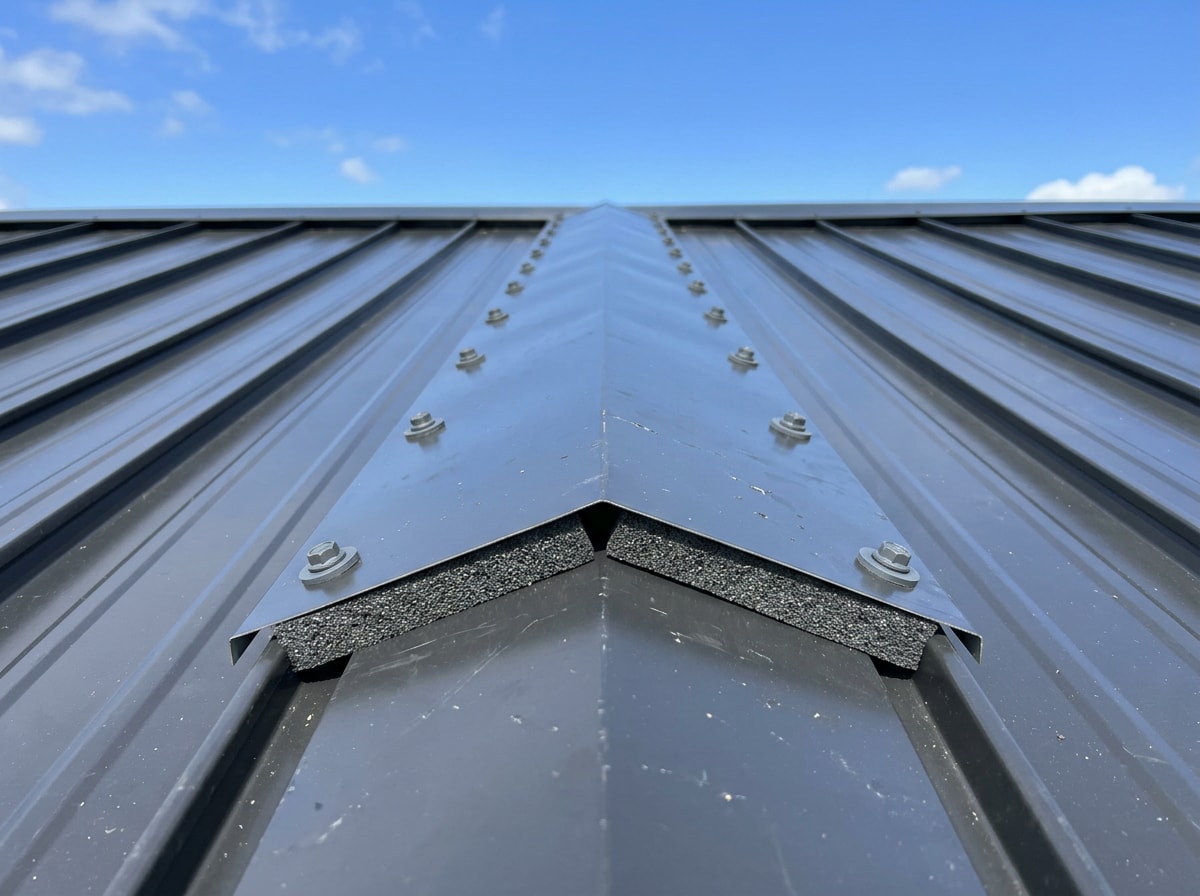
Center the ridge cap over the peak, align it with the roofline, and fasten it down with roofing screws spaced according to your manufacturer's guidance.
Final Inspection
Before you call the job finished, walk the entire roof: check every fastener for tightness, every overlap for full contact, and every trim edge for straight alignment. Loose screws or gapped overlaps are far easier to fix now than after the first hard rain finds them.
Clear off any leftover screws, metal shavings, or trim scraps. Debris left on the roof can scratch the coating or trap moisture. Once the roof is up, schedule a yearly roof inspection to catch loose fasteners early, and call for roof repair right away if a storm ever finds a gap you missed.
If a full re-roof is more than you want to take on, a roof replacement handled by a licensed crew skips the trial and error entirely.
FAQ
If you're still comparing installers or getting quotes, request a free estimate to get a second opinion from a licensed crew before you commit either way.
Can I install metal roofing over existing shingles?
Yes, often, if your local building code allows it. The existing layer needs to be a single, flat, damage-free surface. Anything rotted, uneven, or already double-layered should come off before a metal roof goes on top.
What is the minimum roof slope for metal roofing?
Most manufacturers recommend a minimum slope of 3:12 for standard exposed-fastener panels to drain properly. The current IRC sets a lower 1:12 minimum for structural standing-seam systems, since sealed seams handle shallower pitches better than exposed fasteners do.
Can I install a metal roof myself, or should I hire a professional?
A DIY overview like this one can help you understand the process, but installation involves real fall risk, exact measurements, and code compliance. Many homeowners handle a garage or shed roof themselves, while a full house re-roof is often better assigned to a licensed roofing contractor.
What screws should I use for metal roofing?
Use self-tapping roofing screws with a bonded rubber washer, matched to your panel's coating to avoid corrosion between dissimilar metals. These screws seal each fastener hole against moisture while holding the panel down, and manufacturers typically specify an exact screw type and length for their panel profile.
How long does it take to install a metal roof?
A licensed crew typically finishes an average single-family roof in two to four days, depending on roof size and complexity. A first-time DIYer working solo or with one helper should expect the job to take considerably longer, since measuring, cutting, and fastening go slower without experience.
Does metal roofing cost more than asphalt shingles?
Yes, upfront. Steel and aluminum panels cost more per square than asphalt shingles, and standing-seam systems cost more than exposed-fastener corrugated panels. The tradeoff is a roof that can last decades longer with less maintenance, which narrows the cost gap over the life of the roof.
We serve homeowners across Longview, Vancouver, Kennewick, and the wider Southwest Washington Metro area. If you'd rather leave the ladder work to a licensed crew, get a free estimate and we'll walk your roof with you before anything gets ordered.